Objectives
This lab takes a look at UNIX through an online experience on a Red Hat Linux server. In this lab, you will:
- Log on to a Linux system locally and remotely
- Log on to a Linux system using both character-based and graphical interfaces
- Start a terminal window session from a graphic desktop.
- Start multiple sessions on a single system
- Perform simple tasks using both commands and graphical icons
- Exit from a login session
Forum
If you get stuck, have a question or want to share something you learned with this lab then use the CIS 90 Forum at http://simms-teach.com/forum/viewforum.php?f=9
Procedure
Read through this lab document carefully before starting. There are a number of questions to answer as you work through the lab. You may wish to print out a copy of this lab to serve as a guide and for recording your answers. When you submit the lab, you will be asked for some of these answers. You may submit more than once if you want to change your answers. Have fun exploring...
Grading Rubric
25 point total. Two points for each correct answer given on your lab submittal and one point for locating a Linux PC to use.
Part I - Using a Remote System
Step 1 - Start with local Linux or Windows system
For this part of the lab you will need a Windows or Linux PC that is connected to the Internet. From that PC you will access a remote Linux server named Opus using a secure shell client (SSH). SSH is already built into Linux, however for Windows an add-on program like PuTTY is needed. There are a number of PC's in the CIS Lab for students to use for this lab. The CIS Lab is in room 2504 of the main Aptos campus. The PC's to use are along the wall facing room 2503. The Windows PC's in the CTC can also be used for this part of the lab as they have Putty installed.
If you decide to install PuTTY on your own Windows computer you may wish to read the Howto on PuTTY installation.
If you are starting from Windows go to Step 2a, from Linux go to Step 2b.
Step 2a - SSH from Windows
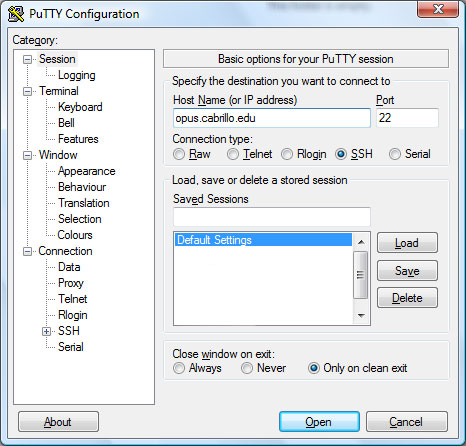
From a Windows machine, run the PuTTY program. Double-click the icon and specify the name of the remote system (opus.cabrillo.edu), and SSH as the means of access.
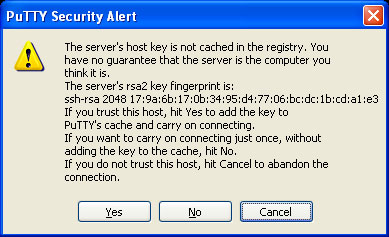
Note: when attempting to connect to Opus for the first time from a given machine, you may get an alert and asked to confirm the identity of Opus, (17:9a:6b:17 ...), select "Yes" to continue.
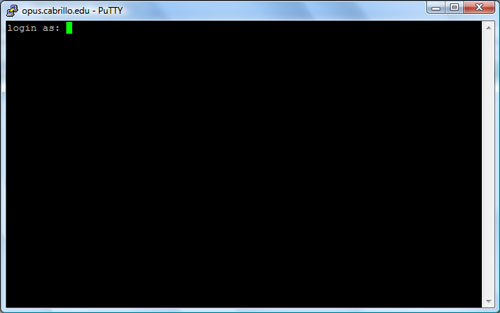
Next you will be prompted for a username and password.
For this initial lab, use guest90 as the username and the password that was given out in class. When you get the Terminal Type? [xterm] prompt, just press Enter.
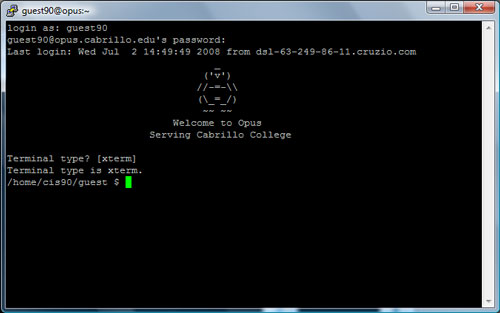
Congratulations! You are now logged in and can proceed to Step 3.
Step 2b - SSH from Linux
If you are on a Linux computer, bring up a terminal window. To do this on Red Hat 9, just right click on the desktop and select "New Terminal" on the pop-up menu.
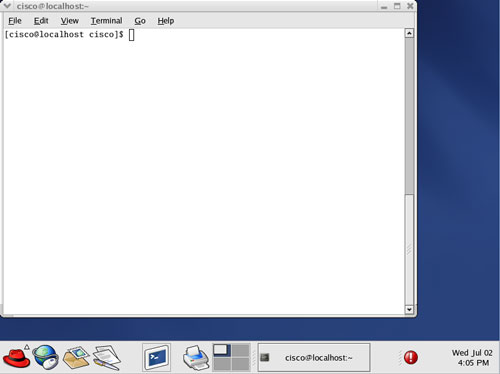
Then on the Linux command line, simply type:
ssh guest90@opus.cabrillo.edu.
Note: when attempting to connect to Opus for the first time from a given machine, you may get an alert and asked to confirm the identity of Opus, (17:9a:6b:17 ...), type "yes" and press Enter to continue.
For this initial lab, use guest90 as the username and the password that was given out in class. When you get the Terminal Type? [xterm] prompt, just press Enter.
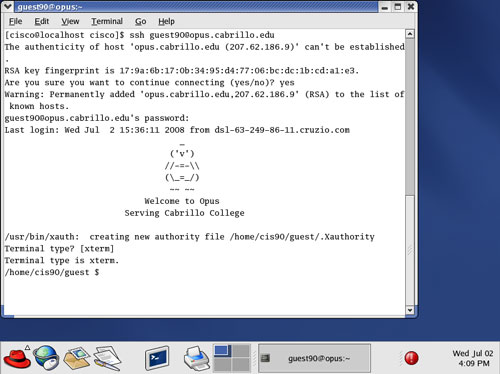
Congratulations! You are now logged in.
Step 3 - Entering commands
Notice how the system prompts you for entering commands. The prompt is a string of text, ending with a $ symbol.
- What is the prompt you get from Opus?
-
We will use some simple commands to gather some information before we logout. Type each command below and answer the questions. Remember to press Enter after each command.
dateIs the date and time correct?
-
cal
How many months does it display?
-
who
How many users are currently logged onto the system?
If there is more than one person besides yourself, who has been on the longest?
-
who am i
Now you can see just your own session. What terminal device are you using to access Opus?
-
id
Find out who you are. What is your uid (user id) number?
-
clear
What happens to your screen?
-
ps
This command shows your active processes. Every program you run shows up as a process. At this point you are running a shell and this command. The names of these two processes are shown in the CMD column. What is the name of the shell you are using?
-
tty
This shows the terminal device the operating system using to read input and write output for this login session. What terminal device are you using to access Opus?
-
See what you can discover about the following commands. What do each of the following commands do?
- uname
- hostname
- history
- To exit your current login session, type exit and you will terminate your shell, which will log you off the system.
Part II - Using a Local System
Step 1 - Locate a Linux System
For this portion of the lab you will need direct access to a PC running Linux. There are a number of PC's in the CIS Lab for students to use. The CIS Lab is in room 2504 of the main Aptos campus. The PC's to use are along the wall facing room 2503.
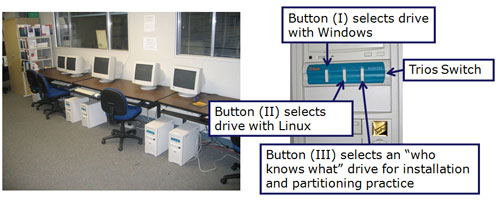
These PC's can boot up from one of three different hard drives. The middle Trios button should be pressed to select the Linux drive.
There is one PC with VMware Server and a Red Hat VM in the Computer Technology Center (CTC) for students to use. See the Howto on Using Linux at Cabrillo College to see how to start the Linux VM on a VMware Server.
Step 2 - Login
Startup the PC and note the graphical interface and the text box prompting you to enter your login name.
Login into the graphical system using the username and password you were given in class. The login information is also available on the whiteboard in the CIS Lab.
Step 3 - Use the local system
- What do you notice to be different about a graphical login?
Were you asked for a terminal type? - The multiuser capabilities of UNIX are usually exercised by users logging in from different
terminals e.g. terminals in various locations around an office building. An added feature of
being at the console of a UNIX machine is that you can run multiple login sessions from a
single console. Let's do that!
From the keyboard, type: Ctrl-Alt-F1
where f1 is function key 1. Be sure that these keys are all down at the same time. - This is a character-based interface allowing you to login in a non-graphical format.
We often call this a terminal interface because it resembles the interface of a standard serial terminal. Sometimes you'll hear the term virtual terminals used to describe these logon screens because they look and behave as if they were real terminals. - Log in from this terminal session using the same username and password as you did above. What prompt are you seeing in this local terminal interface?
- Use the who command to see who is on this system. You should see both of your login sessions. How can you tell them apart?
- In general, you can log in to a local UNIX machine from as many virtual terminals as
the operating system supports. How many does Linux support?
(Hint: Holding down the Ctrl-Alt keys, press the other function keys (2-7) one at a time.) - Log in to virtual terminals tty2 and tty5 and verify using the who and who am i commands.
- Using the commands you learned on Opus, answer the following questions:
- Do you have the same user id on each of the virtual terminal sessions?
- Is your command history the same for all login sessions?
- How can you distinguish between the different login sessions?
- What is the name of the local computer?
- If you log off one session, do you get logged off all the sessions?
- Before graphical user interfaces came out on UNIX, this was the way that users were
able to simulate multiple windows. UNIX had this concept of windows before
Microsoft did, the UNIX community called them screens. Let's go back to our
graphical session. Do you know how?
Press: Ctrl-Alt-F7 - A graphical interface is often thought as being easier to use than a command-line interface,
because you don't have to memorize commands, and you don't have to type so often. Instead,
you use the mouse to look around for meaningful icons and menus, and just point, click and
double-click. See if you can accomplish the tasks we did from the command-line by making menu
selections from the Main Menu (the Red Hat on the bottom-left of the task bar).
How do you:- Find the current date?
- Find a calendar of the current month?
- Can you find out who else is on the system?
- Log off?
- Sometimes it's just easier to use a terminal when you know what you want to do.
A graphical session allows you to run a terminal session in a separate window. Click on the
Main Menu (red hat) icon and select System Tools menu. At the bottom of this menu, select
Terminal.
A 25 line terminal window should now appear so that you can run any UNIX command. Using who and who am i commands, what terminal device you using now? (Warning: typing the exit command will close this window session.)
Step 4 - Submit this lab
- For your last task, you will use the ssh command to remotely log in
to Opus and submit your lab. From your terminal window, type the following line:
ssh guest90@opus.cabrillo.edu
Note: You may receive a warning message about a key finger print. If you do, just type yes and press Enter.
Supply the password (and terminal type) when prompted. - Once you are logged on to Opus, run the submit command.
submit
This is not a UNIX or Linux command, but it is a script file. It will first ask which lab you are submitting. Since this is Lab 1 enter a 1. Then it will ask you for your first and last name so that we can prepare a home directory for you. It will also ask you for the answers to 12 questions about the information you collected from this lab. - Don't forget to log off both the Opus computer and your local terminal session and
your Graphical Desktop.
Congratulations!! You've completed your first lab.