Procedure
There are 6 steps to making your VMware server accessible from anywhere
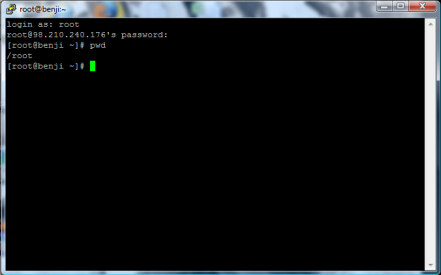
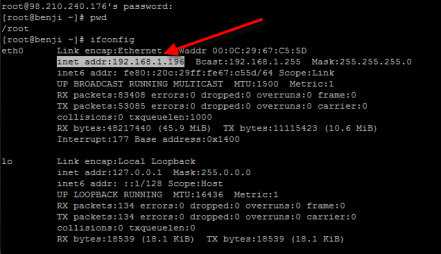
Step 1 - Determine the IP address of your Virtual Machine
- Launch VMware server with the appropriate Virtual Machine
- Enter "ifconfig" on the command line of your virtual server and note the inet address
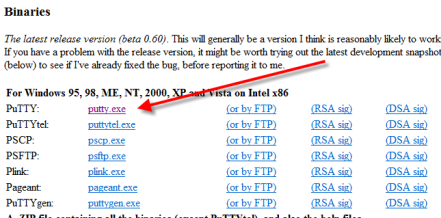
Step 2 - Download the PuTTY SSH client
- Download PuTTY from here
- All you need to download is the "putty.exe" noted below from the download page.
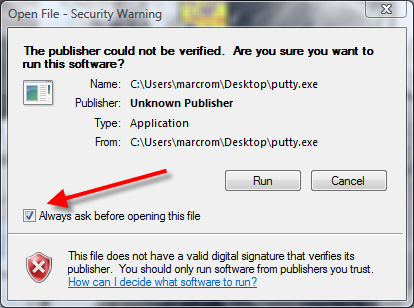
Step 3 - Installation
The PuTTY program is a single executable that does not need to be installed. You can simply download it to your desktop and launch it from there. The first time your launch PuTTY, you might get a Security Warning about the publisher not being verified. It is safe to uncheck the checkbox that says "Always ask before opening this file".
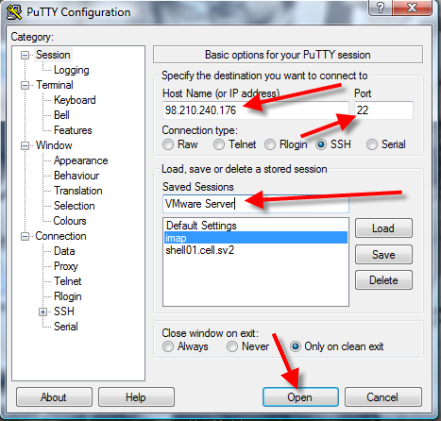
Step 4 - Configure Vitual Machine Connection Profile in PuTTY
- Enter the IP address of your Vitual Machine in the "Host Name (or IP address)" field
- Check to see that you are using port 22
- Enter a name for this profile in the "Saved Session" field
- Click the Save button to store your profile
Step 5 - Access your Virtual Machine
Click "Open" on the PuTTY configuration screen to access your VM. The first time you access your VMware server from any computer, you will see a PuTTY Security Alert. Click "Yes" to add the key to PuTTY's cache

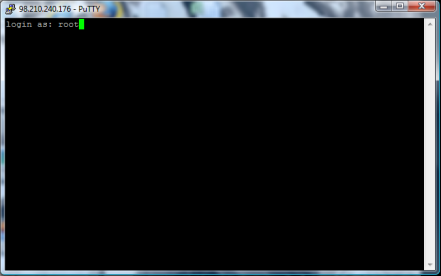
Step 6 - Login
At this point you will see a familiar login prompt
Once logged in, you will have all the functionality of the VMware console, but you won't have to use ctrl - alt to jump in and out of the virtual Machine console.